21 Landscape Photography Tips
Landscape photography is a broad category of nature photography that focuses on showcasing the great outdoors. We all share a connection to the landscape in some form or another and photographing it to preserve our memories and experiences within it is common – taking photos while traveling, while on a walk, or even when you stop your car to take a photo of a sunset while driving. It is all considered landscape photography!
The discipline itself is a classification for those dedicated to intentionally photographing it, highlighting the absolute best or most unique aspects of the landscape on a regular basis as they see it. For those that succeed at it, the photography can elicit emotions in the viewer, just like in other art forms. Think music. Just like music it can bring about a full range of emotions, and not necessarily just the positive ones associated with a ‘pretty view’ either. It’s no easy task being able to capture something so vast and so meaningful to so many people which is why I have written down 21 landscape photography tips to help guide you on your way to becoming a better landscape photographer.
Why 21? It was just a random number that popped into my head before I started to compile the tips! It turns out there are many many more than that and you might find some of these are obvious or that you already know most of them. Great! Try to pick something out of it that moves you forward in a meaningful way on your landscape photography journey, I assure you there’s something for everyone.
1. LOCAL WEATHER

Study weather patterns in the locations that are close to your home and in the areas you photograph regularly. Identify what causes certain conditions and then keep your eye on the weather so that you can be in position when they unfold.
Here in the Canadian Rockies I am interested in monitoring fresh snowfall, clearing storms, lightning, Chinook winds, extremely cold temperatures, frost, fog, inversions, and cloud cover. Use a variety of sources for your weather information to build an average prediction of what’s going to happen. SpotWx gives you a variety of models and Windy gives you a quick visualization of data over time. Those are the two main sources I use. Clear Dark Sky I’ve found useful at night.
Become an expert on weather in your local area so that you can zero in on those changeable elements that you want in your shots. Always a gamble, it is exciting chasing certain weather and it does require persistence. Persistence that pays off as it’s a key element in improving your landscape photography. The best moments are fleeting, often lasting for a minute or less!
2. USE APPS

There are a whole suite of apps available on your smartphone which can help improve your landscape photography. I would recommend at the least having either Photopills or the Photographer’s Ephemeris downloaded.
The key use for landscape photography are the light angles that it shows you for given dates/times. Sunrise and sunset times are plotted, and it shows you when the golden hour is, moon rises/sets & phases, milky way movement, meteor shower peaks….the list goes on. In addition, it also has useful tools showing you equivalent exposure times for filter usage & hyperfocal distances among others. In the mountains I regularly use the tool that shows you when and where the sun or moon will appear above the peaks.
Other apps I recommend are Spaceweather Live for aurora prediction, as well as Google Earth and Gaia for scouting, and Windy for weather. I invest time into planning using apps but also balance their usage because when you leave home on your shoot you want to be focused on your surroundings and leave yourself open to the spontaneous.
3. AT HOME STUDY - COMPOSITION
Composition is a huge way to improve your landscape photography, and a way to differentiate yourself as a photographer in general. Creating balance and flow, linking and positioning elements, what to include/exclude from the frame, and the colour palette (or lack thereof) just to name a few aspects of composition that should be considered.
This doesn’t come easily and I would recommend raiding your local library for every single book on this topic, reading as much as you can on it before things start clicking. Sure you can work on it in the field too but in the case of composition I recommend coming into the field with as much knowledge on it as you can. That is because it’s a foundation that deserves the extra work and isn’t easily understood without truly thinking about it. Understand ‘why’ you’re making the choices you are.
Whenever reading about composition you will cycle through ‘rules’. These are guidelines only, and have solid reasoning behind them that should be added to your toolbox, but don’t get hung up on them once you pick up some steam. Eventually you will make the transition to trusting your intuition, and having confidence in any intentional compositional decisions that break away from rules or norms.
4. PRE-PACK YOUR CAMERA BAG

OK, this seems really obvious but hear me out. It is so much easier to have your bag fully packed and by the front door ready to go for your upcoming shoot than scrambling to prep right beforehand.
It is just one more impediment to motivation levels when getting out of bed, especially if you’re photographing sunrises in summer in the Canadian Rockies. You will be getting up between 2-4am to be on location in time for those, and even earlier if you want to reach a more unique location!
This is particularly useful if you see conditions developing out the window ahead of what you expected. Also, have all of the miscellaneous gear applicable to the season you are in as a constant in the trunk of your car as well.
5. EMERGENCY PREP

As landscape photographers we often find ourselves out and about alone, at odd hours and sometimes out of cell phone reception. It’s essential to have an emergency communication device. I would recommend an Inreach device. They don’t take up much weight or room and work outside of cell range.
In addition you should always let somebody know where you are going and when you expect to be back so that they can initiate a search if needed. Another reason the Inreach is helpful is that you can alert your contact that you’ll be back later than expected if necessary as well.
Other emergency preparedness items to consider having on you are a whistle (on a lot of backpack straps these days), bear spray which you should carry year round in the Canadian Rockies, especially if traveling alone at the edges of the day, a First Aid app & a small First Aid kit with some essentials, and some extra warmth like a compressible down jacket.
6. ZOOM LENSES

Another simple landscape photography tip; use zoom lenses. If you are happy with your process using primes or a mixture then stick with it. However, I would recommend zoom lenses for landscape photography. The compromises in sharpness, aberrations and weight these days are far less than in the past.
Covering most of the 16mm-400mm range on a full frame kit with 2 or 3 lenses would be my recommendation. That is 10mm-250mm on a crop sensor.
The advantage of zooms is they provide perspectives that you can’t always get to with your feet. Think the edge of a river or a cliff, offering versatility in your choice of composition. Nature is also imperfect and cluttered. Zooms allow you to work around that limitation so as to include only the things you want in your frame. The more framing options the better!
7. SCOUT

What do you do if the weather or the light is poor but you’ve got some time up your sleeve? Go exploring, or scouting! Where? Anywhere that you haven’t been before or to locations that you think might have good potential.
Build up a location bank in your memory or written down somewhere with notes on when you should return to any worthwhile spots you find. Scouting is time well invested if you want different landscape photography than others and it’s essential for good composition in night photography!
Always take your camera gear but keep expectations low. If you stumble across a beauty then keep the location (and geo-tag) to yourself especially if it could be easily degraded with more heavy visitation. It’s most likely that others will find the location themselves, or they already have, but atleast you aren’t opening the floodgates which is standard care for the environment.
8. REPEAT LOCATION VISITS
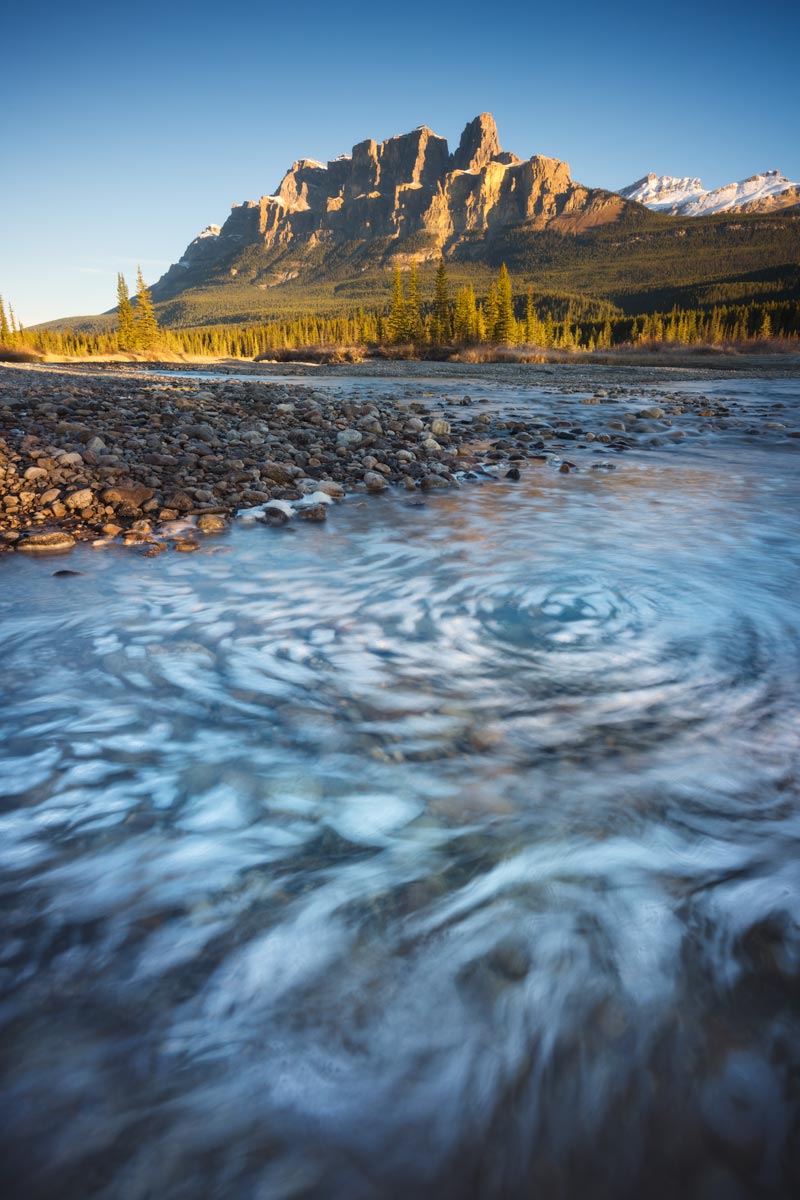


Increase your odds of getting a good shot by visiting locations multiple times. You will become more familiar with the area every time and conditions will be different too. Try to improve upon what you captured the previous time, always walk different paths and investigate other features when at that location, and plan to turn up at a different or better time.
You can see how different Castle Mountain in Banff National Park looks during a summer sunrise, a winter cold snap in morning light, and a winter sunrise in the image set above. Castle actually really shines at sunset when the side light hits the full face creating a golden glow. Looks like I’ll be going back to create something I am happy with from an afternoon shoot.
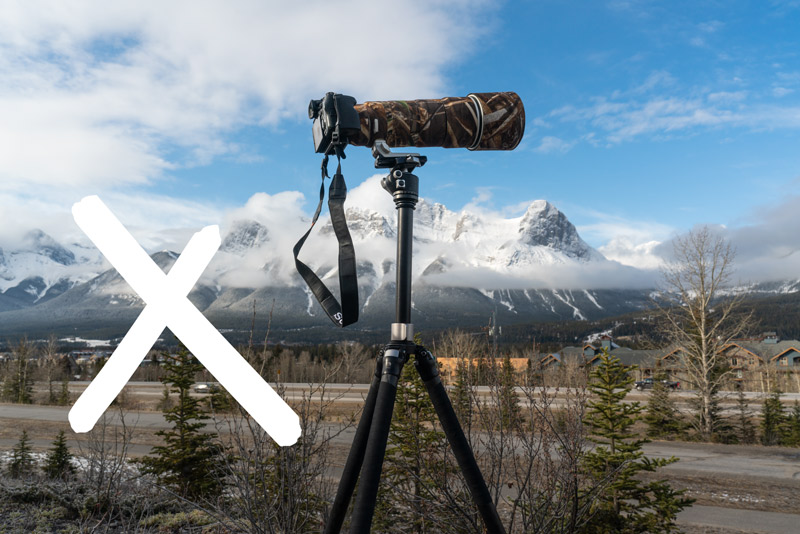
9. EMBRACE OTHER APPROACHES IN THE FIELD

What do I mean by this? Well In the past I’ve found myself to be a very impatient landscape photographer. I would hike everywhere, move at a moments lull in conditions, and generally spend 98.7% of my time moving while out with my camera. That has advantages in that you can find more subjects and unique angles but you can also get caught out in between locations when the sky is exploding above or you don’t quite dedicate enough time to refining the compositions that you do find.
The opposite end of the spectrum is when a photographer hunkers down in one spot and stays for the entire shoot, meticulously working with refining exposure, composition and filter usage. The advantage is that they capture any available peak moments without fail and have a carefully crafted image or two in the bag. They might also miss awesome compositions nearby with this approach.
The same goes for tripod use V’s hand holding the camera. If you are firmly in one camp then you’re missing out on the advantages of the other approach which is beneficial at certain times.
All approaches have merit and if you fall heavily into one category, recognize that and take steps to include elements of other approaches or know when to prioritize one over the other. There is no right way, but I’ll wager a mixture is best.
10. TRIPOD & CAMERA OPERATION FAMILIARITY

Knowing your kit is essential. You don’t want to be getting frustrated or held up by a piece of gear when on a shoot. Getting these technical hurdles dealt with at home or by taking a photography class or workshop really helps. Then you can focus on the task of observing and creating great images!
I would suggest that you get to know your tripod well so that you can quickly change it from horizontal to vertical orientation, and find out its limits: get it as low and high as it goes. Will an L Plate be beneficial, do you need spikes for the feet for better grip & does it support the weight of your camera gear properly? These are questions you need to consider. I recommend a ball head for your tripod head type for landscape photography.
While you are at it, make sure you know the dials on your camera and how to change the key settings: ISO, Aperture & Shutter Speed in particular. Once you have a good grasp of that, look into customizing any custom buttons to functions that you regularly use to further help you on your shoots.
11. SHOOT IN RAW

This tip is a quick simple one. Make sure the image quality setting in your camera is set to RAW file format. RAW maximizes the potential of your camera, otherwise you might as well be photographing with your phone!
If you edit your images it is essential. Even if you don’t, by selecting the JPEG file format and allowing your camera to do the editing, I would still recommend you shoot with RAW + JPEG selected. That way if you change your mind in future you will have the original file to work with. Editing a JPEG file is a no go because you will most likely run into poor image quality issues.
Be aware that now that you are shooting in RAW the files will need to be edited/output with software and will render flat contrast and colours until they are. RAW’s also have a larger file size so you will need to budget hard drive space to store them. I recommend duplicate external hard drives so you have a back up.
12. OBSERVE LIGHT & HOW IT IMPACTS A SCENE

Light breathes life into and gives 3 dimensional form to your landscape photography. Consider it another foundation of a great image with similar weighting as composition in importance.
There are many types of light and ways to describe it. I think of it in terms of its directionality (where it is coming from) – side, back or front, and its strength or height above the horizon – hard, harsh, soft, or diffuse. You can work with any of it but certain subjects look better under certain types of light. I would recommend you begin to observe light every day. This is particularly helpful when you reference the same subject.
Look at the example above of a side lit eroding bank along a highway. I have driven past it many times. It doesn’t look interesting when the light gets too far above the horizon or when it’s angled any other way than from the side. Basic subjects can become compelling in the right light.
13. SIMPLIFY & LEAD THE EYE

A landscape photography compositional tip is to reduce how much is in your frame. Less is more and gives the elements that are in your frame room to breathe. A lone tree is a prime example. Study your composition and decide if it gets stronger by taking away aspects of it through moving a bit or zooming.
Building upon that advice, you also want to try and lead the eye through the frame and find some connection between the subjects in it. Leading lines are an obvious example of how you can achieve this but there are other ways too like through light & shadow, with increasing or diminishing subject sizes, mimicking patterns, and even with subtle post processing choices.
In the picture above with the light on the larch trees I simplified it by zooming in. The arrowhead shape is not a focus if I went wider and also included the mountains. I also lead the eye into the frame through the converging reflected lines. If you want to learn more about composition in the Canadian Rockies then join me on the Banff ‘Light, Lines & Layers’ landscape photography workshop later this year!
14. GET LOW

Shooting from ground level is underrated. I know, it’s dirty and pain to get back up and getting the tripod down low can be awkward too but it’s well worth it and a lot easier than climbing a mountain for a higher perspective on things!
Always consider what foregrounds you can include in your shots. Getting low will emphasize them and give depth to the photo while also reducing the amount of mid ground, two things that you might want to achieve according to the scene. Before you commit to getting down low take a look through your live view display if you have it on your camera and preview what the shot will look like.
Creative blurs, focus stacks and the macro possibilities are three additional things to consider when you’re going after the low perspective. Bring a foam pad or wear some knee pads!
15. SHOOT ALONG THE EDGES

This is a Galen Rowell quote or piece of advice that I read that has stuck with me. It’s a bit ambiguous and open to your own interpretation but once you start thinking about it you notice the sheer potential that is found along the ‘edges’ in landscape photography.
The edge of a weather system (a clearing storm), the transition zone between two vastly different environments (the coastline) or between two climate zones (treeline in the Canadian Rockies), and the edges of lakes and rivers or even a block of ice to name but a few.
If you are stuck then think about this and identify some edges for your next shoot or scouting trip.
16. FAILURE IS PART OF THE PROCESS
The more often you ‘fail’ the quicker you are going to progress so focus on putting in the work and enjoying the process – producing imagery, evaluating the results, and making adjustments. If you have a long term outlook and this mindset you’ll be good as gold. When I say fail I mean it only with regards to your own benchmarks that you might set for yourself.
Compare your progress against your past images and not those of others. Although, viewing the work of other landscape photographers or artists can be inspiration and a way to work out what you like and don’t like, I would recommend doing that at intervals while contemplating your own work more regularly.
It is an ongoing process and you want to avoid holding yourself back out of fear of imperfect results, because it’s those results that you will be building upon the next time out shooting, and so on.
17. WATER FRIENDLY ACCESSORIES

Oftentimes there are great landscape photos to be had in and around water. It is dynamic and adds so much to a photo. Water also kills your camera gear too so you need to take some precautions before getting up close.
Gumboots, water shoes, waders, an umbrella or a lens coat are all great to have accessories for a landscape photographer. I always carry a small towel or two to dry off my camera gear if water gets on it too. Hip waders or kayaking pants I’ve found to be the best balance for allowing you to get further into water while still being lightweight and not unreasonable to carry along. In winter you also need to add ice cleats to the bottom of your boots if there is ice around the water’s edge.
I recommend looking for places where you can include water in your shots, especially to lead the eye through the frame, and where you can experiment with the use of different shutter speeds. Consider adding a screw on polarizer to the lens as they often seal the front of it from water getting inside while giving you the added control of glare.
18. PHOTO CHALLENGES

Our most recent blog explored the advantages of taking on a made up photo challenge, the ‘Near, Far & Wide’ photo challenge. It is a great way to boost motivation, stay sharp, and expand your awareness.
Other more common challenges I’ve heard about include limiting yourself to your least used lens on a shoot, photographing in black and white only, or even shooting every day for a year! Look out for any photo challenges in your community, they are a great way to connect with others and to push yourself outside of your comfort zone.
19. OBSERVE MULTIPLE APPROACHES TO PROCESSING

Post processing is another key way to elevate your landscape photography that should not be overlooked. I place it alongside Light and Composition in importance. Once you have a system for it down it takes very little effort to do a final image justice, and bring a RAW file to life.
I recommend that you view as many approaches to processing as you can until you find what clicks for you and your allotted time available for editing. This means diving into online learning – tutorials, books and in-person learning. Learn from those whose images you look up to but be ready to only walk away with a couple of tips from each source, piecing together your own way over time.
I found this approach was the best way forward as post processing is not easily self taught.
20. SHARING WORK WITH A DELAYED TIMEFRAME
OK, so coming to a landscape photography tip that I could follow more often myself. I often shoot and edit the same day/week although I also have a backlog of images where I take some years before showing the work too so I suppose it is a tie.
Letting your imagery marinate through the editing/curating process is a beneficial approach to improving your landscape photography. I have no doubt that you will notice small things that you would change with each look and you might even notice that the image doesn’t have much going for it or doesn’t resonate with you like the others you are working on.
Your quality will go up and so will how aligned you are with your images because you’ve put more thought into them. Try going offline for a month or more and accumulating a carefully curated set of images. I found it a more peaceful and rewarding way to work when I have followed through with this approach.
21. BE A KID - LEARNING MINDSET

Congratulations on reaching the 21st and final landscape photography tip! No matter how far you are along in your landscape photography journey you will always be changing so your taste and style will be changing too. Technology will be advancing. Different processes will emerge. It’s helpful to always keep a learning mindset and to stay on the lookout for ways to improve or evolve. Be a kid, landscape photography is just one big ongoing adventure in the outdoors!
Thanks for reading. You can join our mailing list below to hear about any new photography workshops or tours that we are offering or leave a comment letting us know if you have any landscape photography tips or advice of your own that you would like to share with us.
Great tips and so informative. Thanks Nick.
I wpuld add one other tip – Join a tour run by Nick to elevate your landscape photography skills as he is an amazing teacher who is eager to help you improve 📷😄🇨🇦
Thanks Belinda, that’s kind of you to say! Come back!
I’m hoping to! You’ll be one of the first people we book! We’ve been using your lessons whilst at Uluru in Central Australia!
Nick, your article on landscape photography tips is a goldmine of knowledge! The tips are practical and well-explained, making it easy for photographers of all levels to improve their skills. Your breathtaking photos are a testament to your expertise. I appreciate the emphasis on composition and patience. This article is a must-read for anyone looking to capture the beauty of landscapes through their lens.
Thanks a lot, I’m glad that you think so!
Thank you for publishing such engaging material on your blog.
Your approach to showing the intricacies of photography turns your posts truly engaging.
Continue the excellent work, and thank you for expanding our knowledge of photography.
Warmest regards, Anja
Thank you Anja!